Programming DMR (buffet analogy) by KB0p
I’ve said it before, to get used to DMR radio programming, we must create a new paradigm of thinking; in the ANALOG radio world, each channel is programmed to an individual frequency (each frequency representing a different repeater), while in the DMR radio world, each channel is programmed to an individual Talk Group (TG).
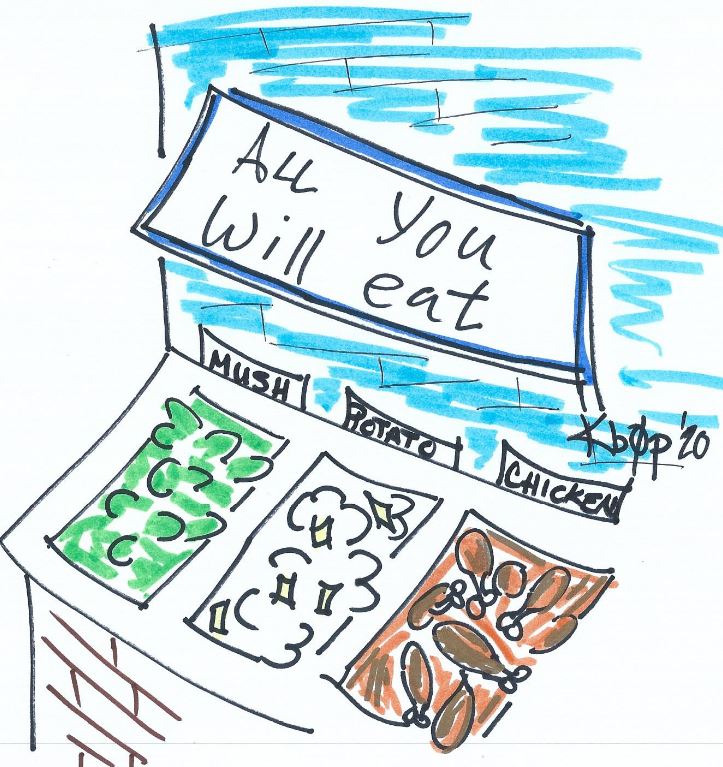
To help explain the programming process of a DMR radio, I am going to use my “Buffet Analogy”. When you visit an All-You-Can-Eat Buffet, you walk up to the feeding-trough with your plate in hand to fill it with your favorite foods– a little bit of this and a bit of that. When your plate is full, you return to your table to savor your choices. Programming a DMR radio can be described in a similar manor.
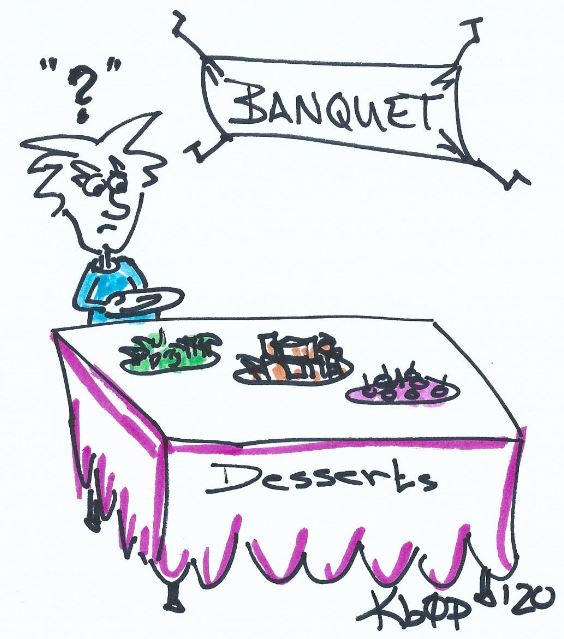
Imagine that the plate that you hold in your hand is the DMR Operating Channel, and the options tabled before you are the “folders” inside your DMR program holding the programming options for each Operating Channel. To program the Operating Channels– filling your plate– you choose bits from each “folder” in the radio to create that Operating Channel.
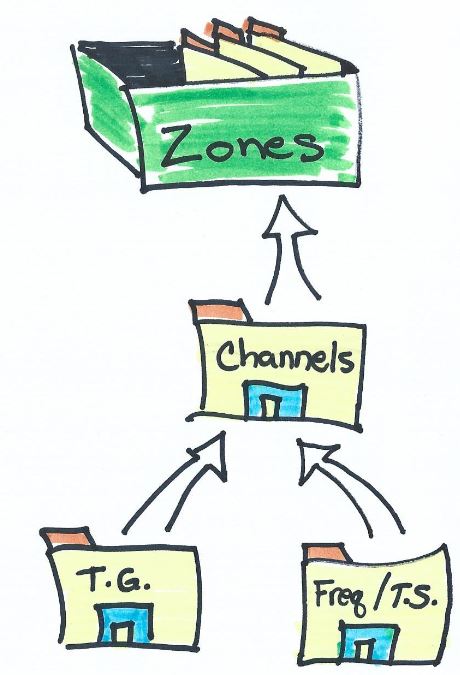
The DMR folders contain the important components required to create an Operating Channel in your DMR radio. Going back to the ANALOG radio– we should all be familiar with analog radio– each analog operating channel contains the following data:
- Channel Number
- Channel Name (if you choose to label the channel)
- Frequency
- PL Tone
The DMR DIGITAL radio Operating Channel requires additional information and this is where the difference in thinking begins. Please notice how items 1-3 are similar to ANALOG operating channels, but there are additional fields in item 4, 5, and 6:
- Channel Number
- Channel Name
- Frequency
- Color Code (CC)— this is similar to PL Tone, but DMR uses CC.
- Time Slot (TS)
- Talk Group (TG)
Prior to creating a DMR Operating Channel, some of the required fields must be stored in a “folder” in the DMR radio– just like a buffet– so that the information is available to choose from while creating your channel.
Once the DMR Operating Channels have been created, then the final step is to program a ZONE. A zone can be thought of as a region or a collection of Operating Channels for a particular geographic location. For instance, I have a couple zones in my DMR radio; one for the Green Bay, Wisconsin area and another for the Marquette, Michigan area. Each zone contains a list of Operating Channels for the repeaters in those towns.
Programming Process
As you now can see, the programming process for a DMR radio is completely different. In the ANALOG world, one simply grabs an HT, enters a frequency into a VFO or memory channel, and is on-the-air with the local repeater. In DMR world the programming process is quite different and more involved.
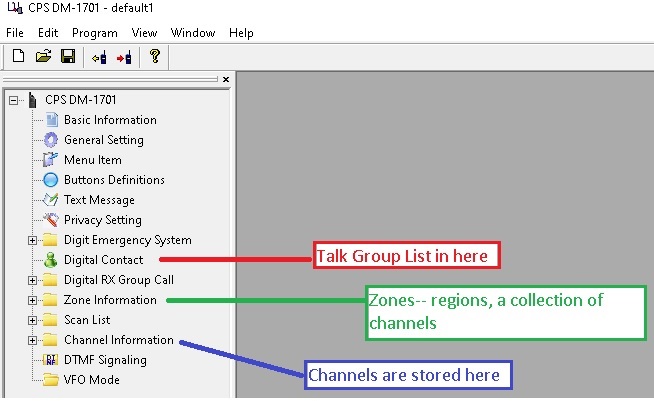
The first step of the programming process is to fill each folder with data– develop your database– from which you will create the DMR Operating Channels:
- Talk Group Folder– create a list of all the available TG’s that you plan to use on the DMR radio.
- Digital Contact Folder– create a list of the available contacts (hams) that are on the DMR network.
- Channel Folder– create all the channels on which you will transmit and receive as you are on the air. This holds the frequency, Color Codes, and Time Slot information.
- Zone Folder– create your operating regions, or group of Operating Channels that you will use while travelling to different parts of the state with your radio.
Once the folders are filled with data, now the process of programming– creating DMR Operating Channels and zones– begins.
As an example, I will show you the basic folder requirements from my radio. The first folder that I will populate is the “Digital Contacts” folder (this folder may have a slightly different name in your radio– each brand of radio may vary). This folder will hold a list of Talk Groups (TG) that I plan to use in the radio, which are required for programming a channel.

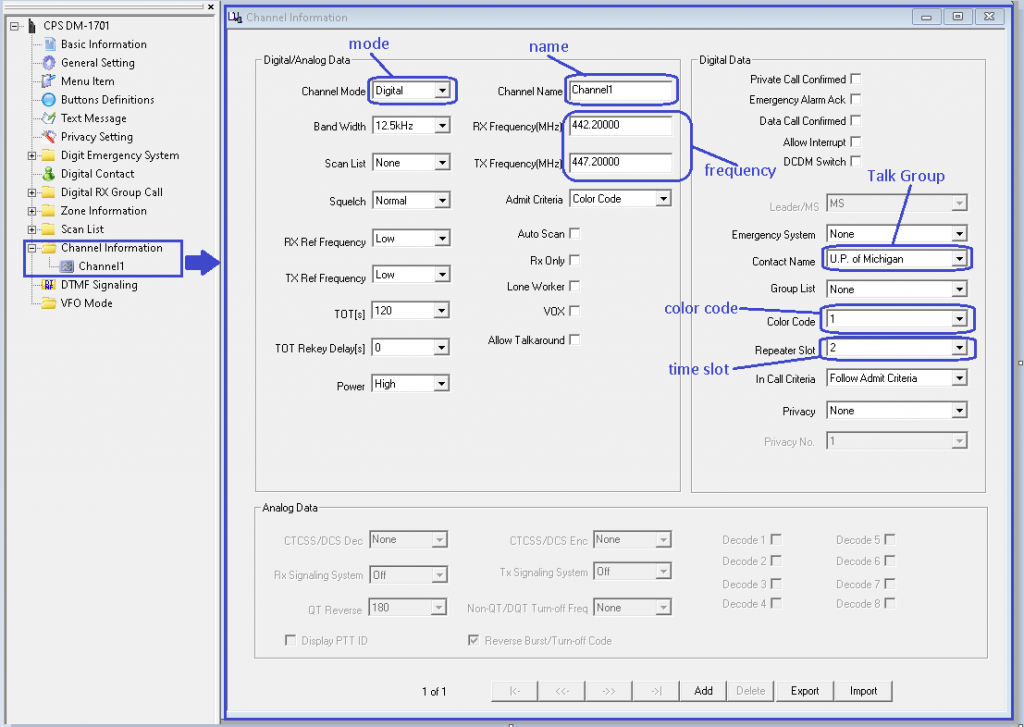
Secondly, I am going to create a channel. Each channel contains the (1) repeater frequency, (2) the repeater Color Code, (3) the repeater Time Slot, and (4) the desired Talk Group– the Talk Group is chosen from the “Digital Contact” folder previously created. In this example, I singled out some of the basic settings required to make a channel work– the mode, channel name (you can label this anything that you want), the frequency, the Talk Group, the Color Code, and the Time Slot. All the extra fields are operator preference and should be self-explanatory (such as the power setting, the time-out setting, etc.).
Finally, we will place this channel (called Channel 1 in our example) into a Zone. In this example, I will create a Zone called Marquette for Marquette, Michigan, which is where the 442.200 repeater used in this example is located. As a reminder, a Zone is a Region. For instance, I could create a Zone (region) for the Marquette, Michigan area and another for the Green Bay, Wisconsin area. Therefore, when I travel to Marquette, I can select Zone “Marquette” and all the Marquette repeaters will only display on my radio. When I travel back to Green Bay, I can select Zone “Green Bay” and all the Green Bay repeaters will only display on my radio. Why display repeaters that can’t be accessed in the region you reside? This makes for a less-cluttered channel line-up.
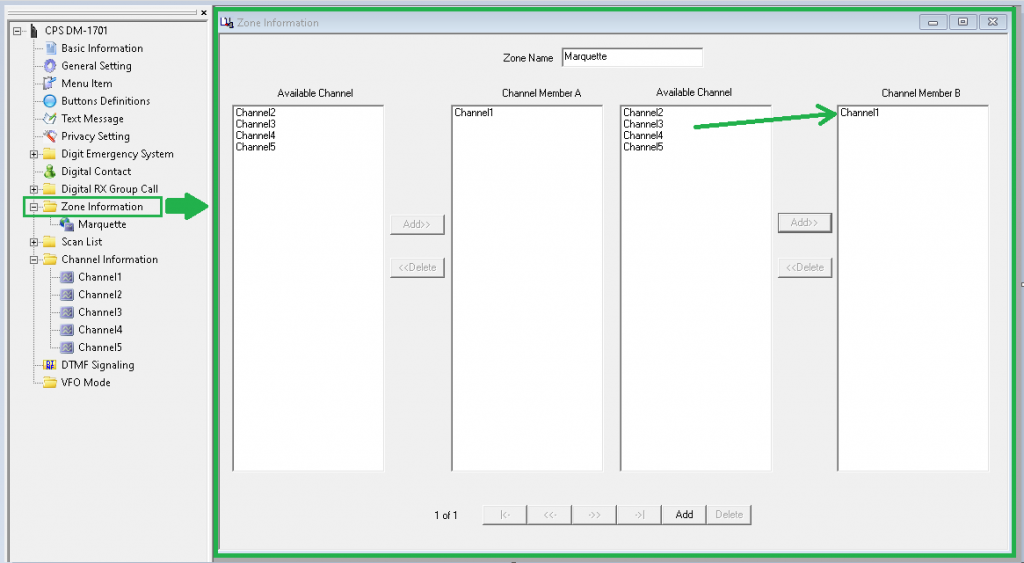
In the above clip, I created a few extra channels to better illustrate my example. Of the available 5 channels I created, I chose to only pull in “Channel 1” in the Zone labeled “Marquette”. The remaining 4 channels still remain programmed in the radio, but I chose to only put one channel in the Marquette Zone. When I create an additional Zone labelled “Green Bay”, I will chose channels 2, 3 for that Zone. Then I could create a Zone labelled “Dayton Ohio” and choose Channel 4 and 5 for that Zone. In other words, I programmed all the channels needed before hand, for all the areas that I plan to travel, and then only load in the channels required for those specific areas (essentially “hiding” the other channels). This is handy, as the Marquette Repeater will not be available in Dayton, Ohio, so I choose not to display the Marquette Repeater while I walk the streets of Dayton. I hope this explanation makes sense.

THIS PAGE IS UNDER CONSTRUCTION AND I WILL BE WRITING MORE (July 2020)
73 de KB0p
